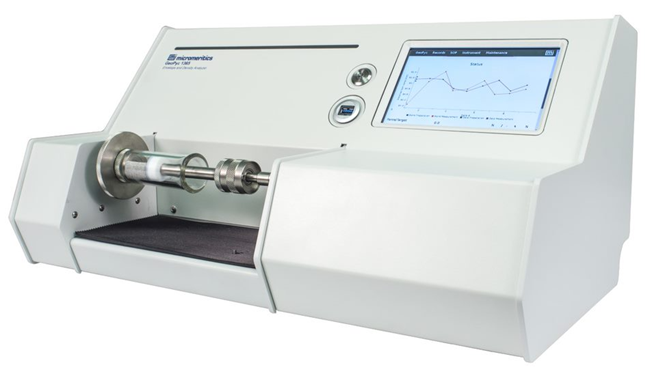
GeoPyc 1365 measures the envelope volume and density of produced pieces.
- Incredibly precise and reproducible outcomes
- Quick operation for a compact benchtop device
- Completely automated reporting and data collection
- Sample integrity is maintained through non-destructive analysis
- An intelligent touch panel for reporting and operating simplicity
- Powders can have their compressed bulk density ascertained using the Trans-Axial Pressure (T.A.P.) analysis option, which complies with ASTM Test Method D8097
- Pore volume and porosity of produced parts, including roller compactor ribbons and sintered solids, are provided when paired with skeletal density

Geopyc 1365. Image Credit: Micromeritics Instrument Corporation

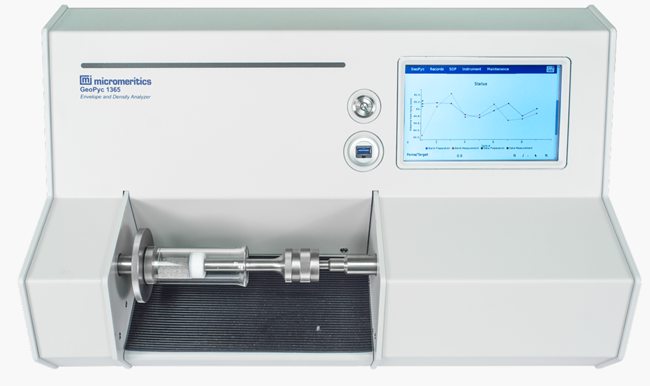
Geopyc 1365. Image Credit: Micromeritics Instrument Corporation
Description
By displacing DryFlo, a dry, free-flowing powder with 'fluid-like' flow behavior, the GeoPyc automatically calculates the volume and density of a solid object. The medium comprises a small number of stiff, tightly packed, small spheres with a high degree of flow ability that are closely packed around the item being studied. Because the particles are tiny enough, they tightly adhere to the object’s surface during consolidation without invading the pore space.
Features and Benefits
- Delivers data from a controlled-compression analysis in as little as 15 minutes
- Can be applied to powders to produce compressed bulk density or formed pieces to offer envelope density
- Since the items under analysis are devoid of waste and dangerous materials, cleaning and disposal will be simple
- Operation made simpler with completely automated instrument control
- Able to function independently and deliver results via email or a web browser
- The capacity to save, program, and utilize many analysis method files
- Operationally simple due to user-replaceable piston tip
- Extremely cheap running expenses because no hazardous materials are required
- Information accessible in CSV download format or as printed reports
Specification
Source: Micromeritics Instrument Corporation
| Reproducibility |
| When sample volume is at least 25% of sample holder volume: Typically ± 1.1% |
| Pressure Measurement |
| 12.7-mm (0.50 in.) ID |
Sample volumes between 0.3 cm³ and 0.8 cm³ |
| 19.1-mm (0.75 in.) ID |
Sample volumes between 0.8 cm³ and 2.4 cm³ |
| 25.4-mm (1.00 in.) ID |
Sample volumes between 2.4 cm³ and 5.3 cm³ |
| 38.1-mm (1.50 in.) ID |
Sample volumes between 5.3 cm³ and 13 cm³ |
| 50.8-mm (2.00 in.) ID |
Sample volumes between 13 cm³ and 25 cm³ |
| Physical |
| Height |
11 in |
| Width |
22 in |
| Depth |
15 in |
| Weight |
42 lbs |
| Electrical |
| Voltage |
85 to 265 VAC |
| Frequency |
47 to 63 Hz |
| Electrical Power |
95 VA |
| Environment |
| Temperature |
15 °C to 35 °C |
| Humidity |
20% to 80% non-condensing |
Technology
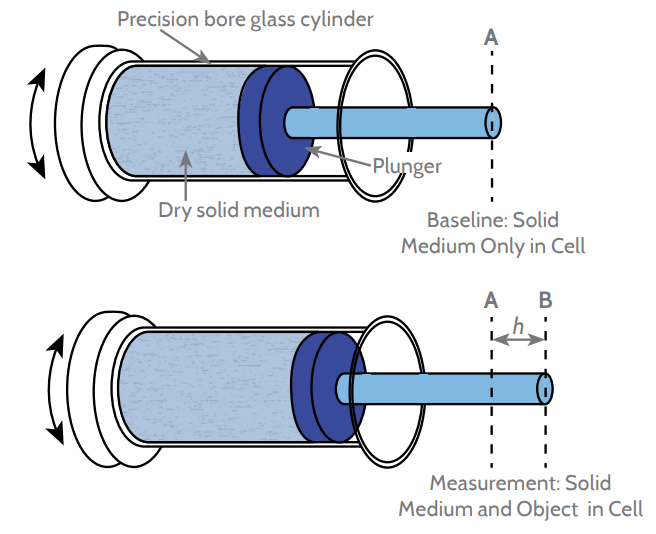
The attainment of repeatability and reproducibility is possible through regulated compaction techniques. The dry medium is placed inside a precision cylinder sample cell. As the cell vibrates, a plunger compresses the powder; the force of compression may be chosen, making test after test repeatable. Preliminary compaction using the displacement media alone in the cell establishes a zero-volume baseline.

Image Credit: Micromeritics Instrument Corporation
The compaction procedure is then performed with the sample in the cylinder containing the dry medium. The displacement volume of the medium is calculated by measuring the variation between the piston's penetration depth into the cylinder during the test (ht) and its penetration depth during the baseline procedure (h0). This difference in depth, represented as h=h0−ht, is then used in the formula for the volume of a cylinder with height h, given as V=πr2h, where V is the volume and r is the radius of the cylinder.
A sophisticated touchscreen controls the GeoPyc. The complete automation of data reporting and collecting makes integrating with LIMS and other data-concentrating systems easy. Numerous sample chamber options suit a broad range of sample sizes. Following the analysis, a quick shake or dusting eliminates the Dry Flo entirely, allowing the samples to be reused or retested.
The GeoPyc offers many working modes to suit the requirements, such as full blank, computed blank, and reference solid calibration with variation. It is feasible to follow developments during analysis, thanks to progress indicators and initial findings.
Configuration
T.A.P. Density Option
The GeoPyc T.A.P. density option is faster, quieter, and more reproducible than traditional tap density analyzers while still producing accurate readings that are comparable.
The GeoPyc evaluates the packing volume and determines the bulk density of granular and powdered samples, including pharmaceutical and electrochemical materials, under various compaction circumstances when outfitted with the T.A.P. Density option.
The sample chamber is turned and shaken while a precise, predetermined force is given to the sample to calculate the T.A.P. density. The consolidation force is measured in Newtons by a force transducer, and the consolidation piston and plunger travel distance are measured in steps. The user sets the number of consolidations per analysis and the force used. The GeoPyc automatically determines volume and density by averaging the values from each consolidation and reporting the findings in cm3 and g/cm3.
Accessories
Source: Micromeritics Instrument Corporation
| Part Number |
Description |
Notes |
| |
Reference Materials |
|
| 136-33001-00 |
Chamber and Plunger Kit |
Includes one each of 12.7 mm, 19.1 mm, 25.4 mm, 38.1 mm, and 50.8 mm diameter chamber and plunger assemblies |
| 136-25801-00 |
12.7 mm Chamber and Plunger Assembly |
Includes both the 12.7 mm diameter chamber and corresponding plunger assembly |
| 136-25802-00 |
19.1 mm Chamber and Plunger Assembly |
Includes both the 19.1 mm diameter chamber and corresponding plunger assembly |
| 136-25803-00 |
25.4 mm Chamber and Plunger Assembly |
Includes both the 25.4 mm diameter chamber and corresponding plunger assembly |
| 136-25804-00 |
38.1 mm Chamber and Plunger Assembly |
Includes both the 38.1 mm diameter chamber and corresponding plunger assembly |
| 136-25805-00 |
50.8 mm Chamber and Plunger Assembly |
Includes both the 50.8 mm diameter chamber and corresponding plunger assembly |
| 136-25801-10 |
12.7 mm Chamber only |
Used with 12.7 mm diameter plunger assembly, 136-25801-11 |
| 136-25802-10 |
19.1 mm Chamber only |
Used with 19.1 mm diameter plunger assembly, 136-25802-11 |
| 136-25803-10 |
25.4 mm Chamber only |
Used with 25.4 mm diameter plunger assembly, 136-25803-11 |
| 136-25804-10 |
38.1 mm Chamber only |
Used with 38.1 mm diameter plunger assembly, 136-25804-11 |
| 136-25805-10 |
50.8 mm Chamber only |
Used with 50.8 mm diameter plunger assembly, 136-25805-11 |
| 136-25801-11 |
12.7 mm Plunger Assembly |
Used with 12.7 mm diameter chamber assembly, 136-25801-10 |
| 136-25802-11 |
19.1 mm Plunger Assembly |
Used with 19.1 mm diameter chamber assembly, 136-25802-10 |
| 136-25803-11 |
25.4 mm Plunger Assembly |
Used with 25.4 mm diameter chamber assembly, 136-25803-10 |
| 136-25804-11 |
38.1 mm Plunger Assembly |
Used with 38.1 mm diameter chamber assembly, 136-25804-10 |
| 136-25805-11 |
50.8 mm Plunger Assembly |
Used with 50.8 mm diameter chamber assembly, 136-25805-10 |
| 136-25801-07 |
12.7 mm Piston Assembly |
Used with piston rod 136-25801-03 to form 12.7 mm diameter plunger assembly |
| 136-25802-07 |
19.1 mm Piston Assembly |
Used with piston rod 136-25801-03 to form 19.1 mm diameter plunger assembly |
| 136-25803-07 |
25.4 mm Piston Assembly |
Used with piston rod 136-25801-03 to form 25.4 mm diameter plunger assembly |
| 136-25804-07 |
38.1 mm Piston Assembly |
Used with piston rod 136-25804-03 to form 38.1 mm diameter plunger assembly |
| 136-25805-07 |
50.8 mm Piston Assembly |
Used with piston rod 136-25804-03 to form 50.8 mm diameter plunger assembly |
| 136-25801-03 |
Longer Piston Rod |
Used with 12.7 mm, 19.1 mm, and 25.4 mm diameter piston assemblies to form corresponding plunger assemblies |
| 136-25804-03 |
Shorter Piston Rod |
Used with 38.1 mm and 50.8 mm diameter piston assemblies to form corresponding plunger assemblies |
| 004-25924-00 |
Quad Ring for 12.7 mm Piston |
Replacement quad ring for 12.7 mm diameter piston assembly |
| 004-25925-00 |
Quad Ring for 19.1 mm Piston |
Replacement quad ring for 19.1 mm diameter piston assembly |
| 004-25926-00 |
Quad Ring for 25.4 mm Piston |
Replacement quad ring for 25.4 mm diameter piston assembly |
| 004-25827-00 |
Quad Ring for 38.1 mm Piston |
Replacement quad ring for 38.1 mm diameter piston assembly |
| 136-25874-00 |
Quad Ring for 50.8 mm Piston |
Replacement quad ring for 50.8 mm diameter piston assembly |
| 136-25852-01 |
Piston Coupling Extender |
Used with 38.1 mm and 50.8 mm diameter pistons during analysis, and will all pistons during Zero Depth measurements |
| 004-16831-01 |
DryFlo, 3 L |
DryFlo media used for envelope density determinations |
| 004-32177-00 |
Funnel |
Aids when adding DryFlo to chamber |
| 004-27059-00 |
500 µm #35 Sieve, 3 inch |
Use to separate DryFlo from sample |
| 004-27065-00 |
Sieve Pan, 3 inch |
Use to catch DryFlo when using sieve to separate DryFlo from sample |
| 004-54613-00 |
Brush, 3/8 inch x 3.4 inch |
Use to brush DryFlo into and from chambers |
| 008-54105-00 |
Stylus |
For use with GeoPyc touchscreen |
| 003-63821-00 |
Balance Interface Cable |
Used to interface to optional direct-connect balance |
| 003-63801-01 |
Ethernet Cable |
Used to connect to network or computer for data archiving and reporting |
| 136-25815-00 |
Compartment Mat |
Covers bottom of analysis compartment |
| 136-42800-00 |
GeoPyc 1365 Operator's Manual |
Printed manual includes binder and chapter divider tabs |
| 136-33015-00 |
T.A.P. Density Option |
Allows determination of trans-axial pressurized density of powders |
| 011-00000-00 |
Analytical Balance, 120 g Capacity, Readable to 0.0001 g |
Optional direct-connect balance |
Software

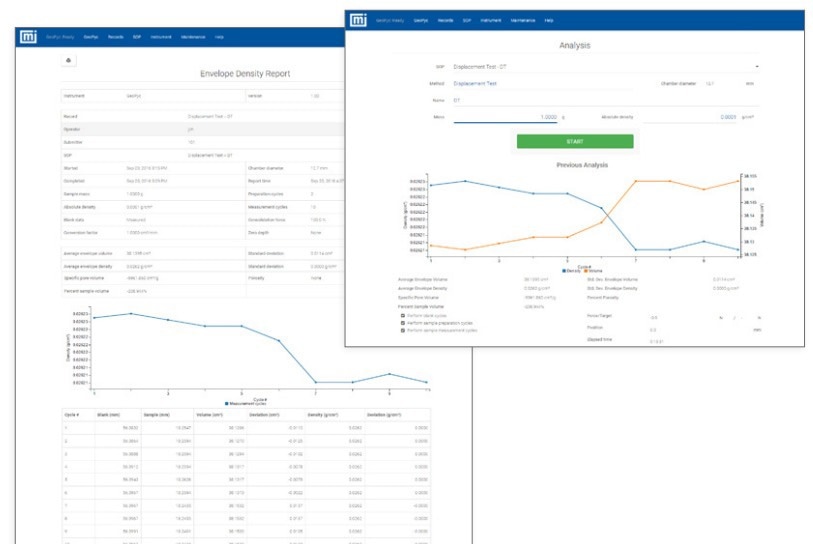
Image Credit: Micromeritics Instrument Corporation
The GeoPyc’s clever touch screen allows users to access its various operating modes. Operating modes allow users to maximize accuracy and speed for a given application include full blank, computed blank, and reference solid calibration with variation.
It is feasible to follow developments during analysis, thanks to progress indicators and initial findings. Information particular to a sample can be included in the analysis reports. The following reports are available: Force Calibration, Instrument Log, Envelope Density, Blank Report, and Volume Calibration.
Micromeritics GeoPyc 1365 - Envelope Density Analyzer
Video Credit: Micromeritics Instrument Corporation